Place Incorrectly Indexed Document(s) on a Temporary Hold
When reviewing a large disposition job, it is possible to come across a number of documents that may need to be re-indexed (e.g. incorrect RRTD, wrong record type, etc.). Though we recommend correcting the document information and postponing the entire disposition job, doing so may not be efficient with large disposition jobs where only one or very few documents are in need of correction.
This guide outlines a method that enables you to isolate any incorrectly indexed documents by putting them on a temporary hold but still allows the disposition of all other documents instead of postponing the entire job.
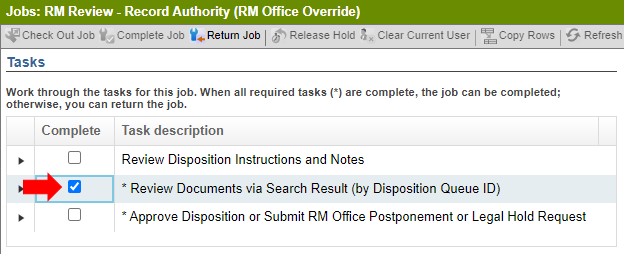
Step 1. Follow the steps outlined in the disposition review procedure until you get to the second job task titled "Review Documents via Search Result".
Note: If you are looking for role-specific training regarding the complete disposition process, you can find the step-by-step guides for RAs and for RCs.
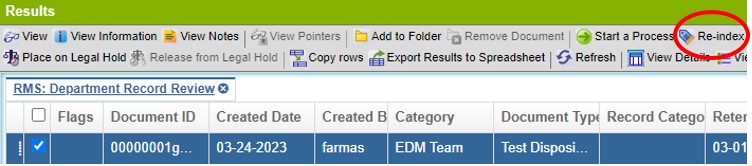
Step 2. Click on the row of the document from the Results panel that needs to be updated.
Next, either click on the "Re-Index" button in the toolbar or use the context menu to click on “Re-Index”.
This will bring up the Index panel on the right hand side
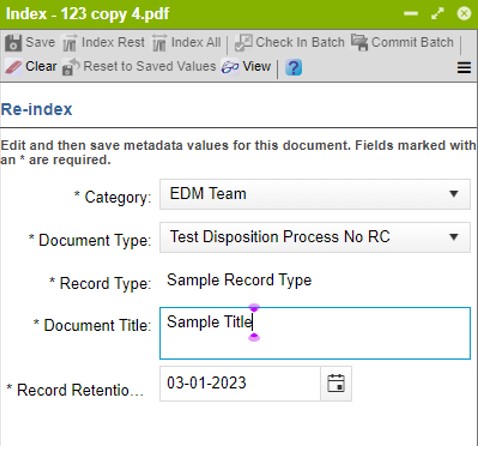
Step 3. From the Index panel, update the "Record Retention Trigger Date" field or the "Record Type" field as appropriate.
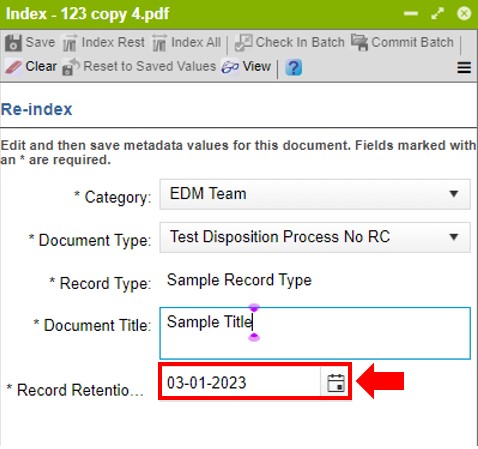
Once you are done with edits, click the "Save" button on the menu bar of the Index panel to save your changes.
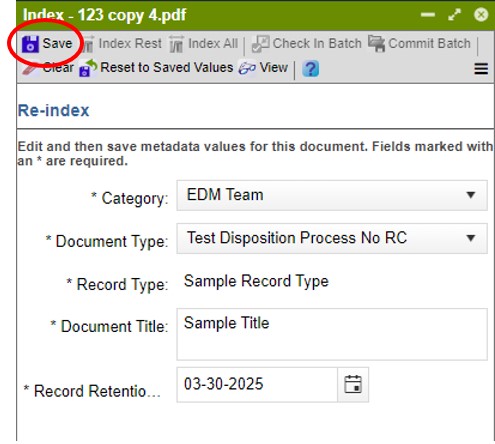
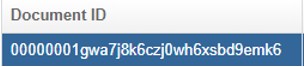
Step 4. After re-indexing the document a message pops up saying that “the document is successfully re-indexed”. Write down or copy the Document ID for each re-indexed document at this point. This is especially important with multiple documents. You will need this information to share with Records Management Services in Step 13.
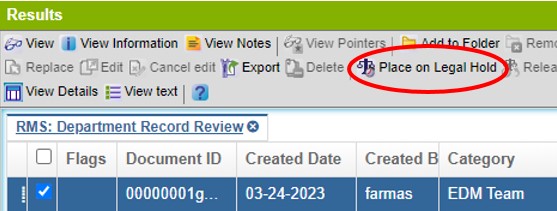
Step 5. Click on the “Place on Legal Hold” button in the toolbar in the Results panel to place the relevant documents on hold.
Alternatively, click on the three-line icon AKA “hamburger icon,” (Panel Menu) and select “Place Document on Legal Hold..."
WARNING: You must place the re-indexed document on hold or the document is going to be approved for disposition regardless of whether you have altered any of the document information or not. If this happens to you, please notify Records Management immediately.
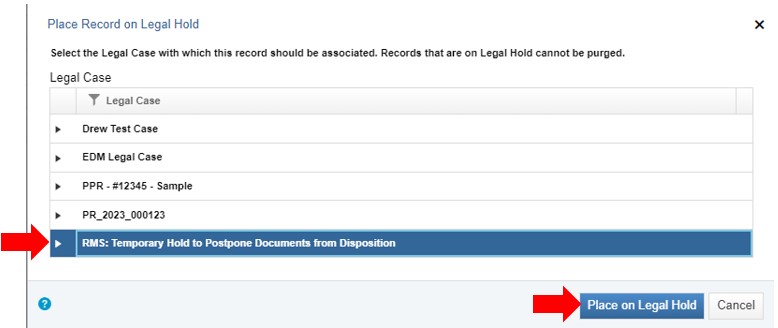
Step 6. The Place Record on Legal Hold window appears, prompting you to associate the document with a Legal Case.
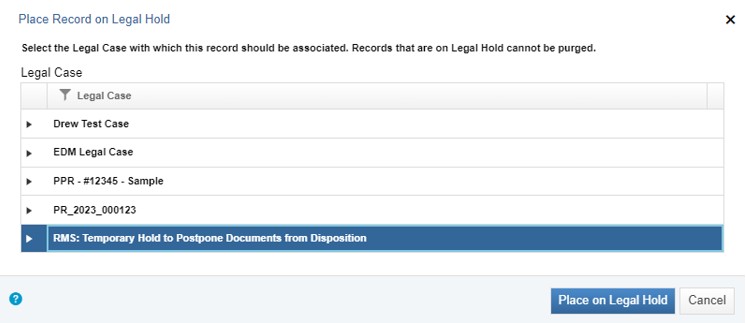
Step 7. Select "RMS: Temporary Hold to Postpone Documents from Disposition" from the list by clicking on it so that it becomes highlighted in blue. It is VERY important to select the correct one. Then click on the “Place on Legal Hold” button.
IMPORTANT: If you assign any record(s) to the wrong Legal Case, you MUST contact Records Management Services to correct this. If you place the incorrect record in the Temporary Hold, you MUST contact Records Management Services and alert us of the mistake so we can release the record(s).
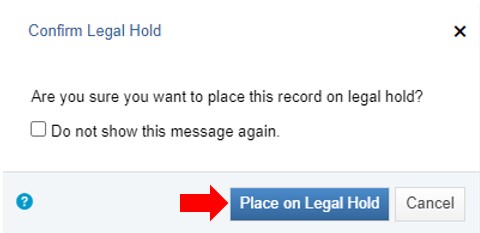
Step 8. The Confirm Legal Hold window pops up, asking you if you are sure you want to place the selected record(s) on legal hold. To confirm, press Place on Legal Hold.
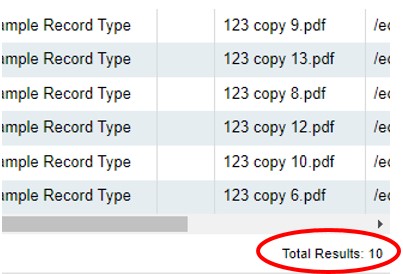
Step 9. After confirming a message pops up saying “Document(s) successfully placed on hold." The document is now on a temporary hold.

At this point the Results panel will refresh and document(s) placed on hold will disappear from the list. You can verify this by checking the document count at the bottom right of the panel.
Step 10. When you’re done correcting the document(s) and have put them on a temporary hold, finish the job review.
Step 11. Back in the Jobs panel, select the third task titled "Approve Disposition or Submit RM Office Postponement or Legal Hold Request" under Tasks.
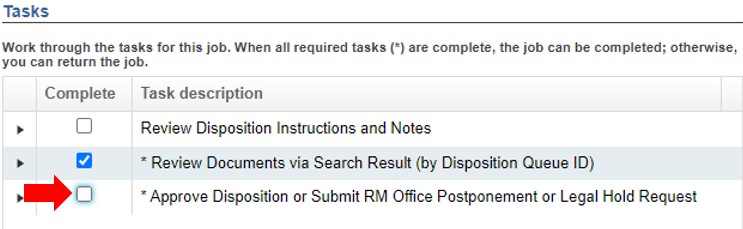
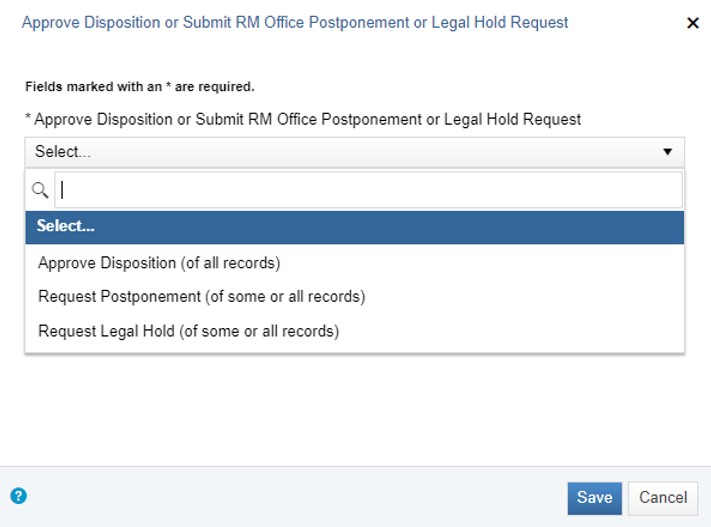
Step 12. A dialogue box will appear once you click on that task, and you will have three choices:
- Approve Disposition (of all records)
- Request Postponement (of some or all records)
- Request Legal Hold (of some or all records)
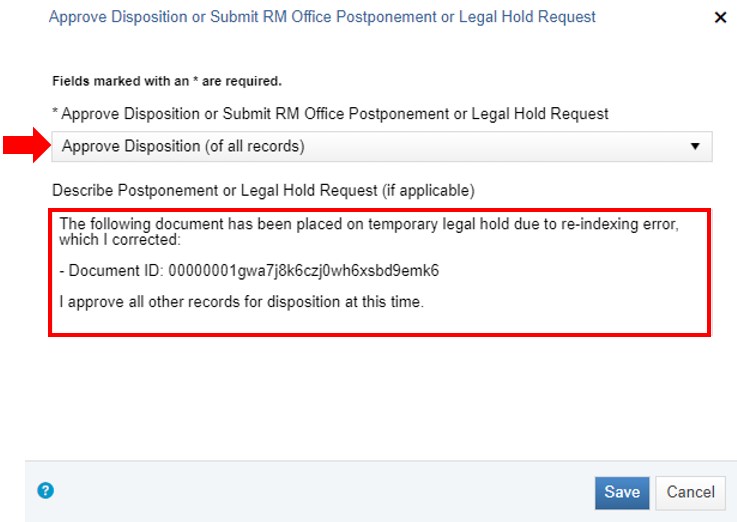
Step 13. For approval, select Approve Disposition (of all records). Use the Describe Postponement or Legal Hold Request field to inform RMS of the document(s) you have placed on temporary hold to make corrections. This is where the Document IDs you wrote down in Step 5 are put to use. RMS will use this information to identify the correct documents and release them from the temporary hold.
WARNING: You MUST contact Records Management Services to release these documents from the hold. Failure to contact RMS will result in these documents remaining on hold until RMS releases them. If you forget to add a note in the Describe Postponement or Legal Hold Request field, you need to contact Records Management Services via recmgt@uw.edu.
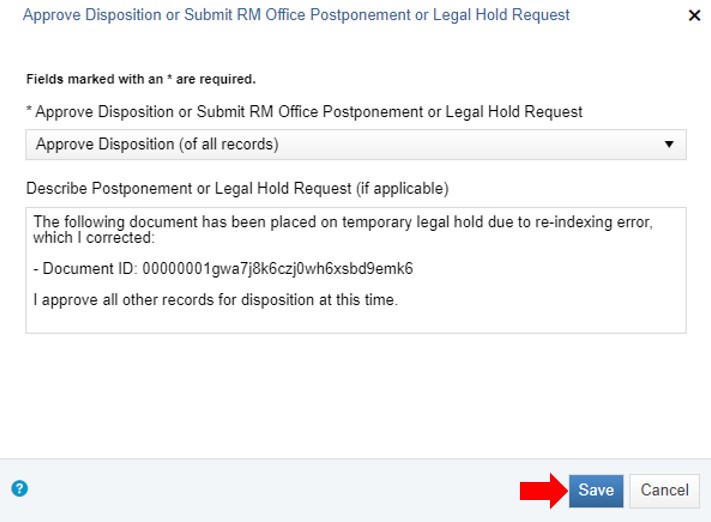
Step 14. Once you made a note of the records you have placed on temporary hold, click on the “Save” button at the bottom of the dialogue box.
Step 15. Select “Complete Job” located in the Jobs panel toolbar. Once you complete the job, the disposition batch advances to the next reviewer. (Depending on your role this is either the Records Authority or the RMS Compliance Analyst.)