If you use Outlook to view your UW Exchange email, you can share email folders with other UW employees. Creating a shared folder will give the individual(s) you specify access to the emails, contacts, tasks, or notes contained in that folder. You may remove access to a shared folder at any time.
Sharing folders is preferable to forwarding in that it 1) doesn't change the metadata (Date, Sender, Recipients, etc.) of the email, and 2) it doesn't add to your account usage. Your office might find shared folders to be useful in any of the following circumstances:
- When an employee separates and emails need to be transferred to a supervisor or colleague
- When an employee goes on vacation or extended leave
- When two people are working on the same project
- Anytime two people need access to shared information
On this page you will find instructions for granting and removing access to shared folders. Please note that the screenshots provided in these instructions reference only the desktop application of Outlook. Once set, the policies will still work if you are using Outlook 365 online.
Granting Access to Folders in Outlook
When sharing folders in Outlook, remember that folder permissions are very explicit. The steps vary depending on whether you are the one granting (User1) or receiving (User2) access.
To grant access to your folder(s), User1 must:
- Grant User2 limited permissions to your email account
- Then grant User2 limited permissions to any parent-level folders
- Finally, grant User2 permissions to all folders whose contents you wish them to be able to access
To display folders you have been granted access to, User2 must:
- Change the settings of your email account to accept shared access from User1
- Click on the arrow to the left of User1's name to view their shared folder(s)
If you have already been granted permission to view another person's shared folder, please skip to the section for User2 below.
User1: Follow these steps to share a folder with a colleague
Step 1: Granting limited permissions to your email account.
This will allow User2's Outlook to discover that you are sharing one or more of your folders.
Note: If the email account belongs to a UW shared netid, you may need to contact UW-IT about managing group permissions to the shared netid account before following the instructions below.
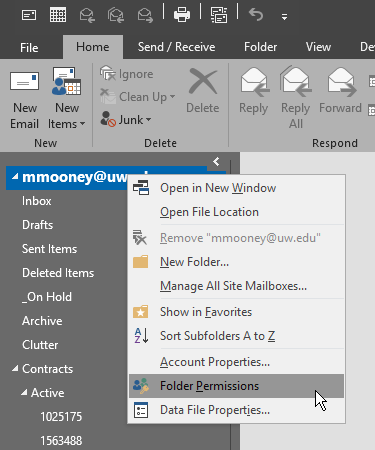
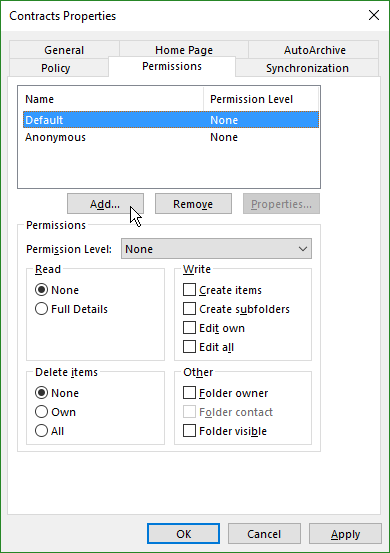
In Outlook, right-click on your email address at the top of your folder list and choose Folder Permissions.
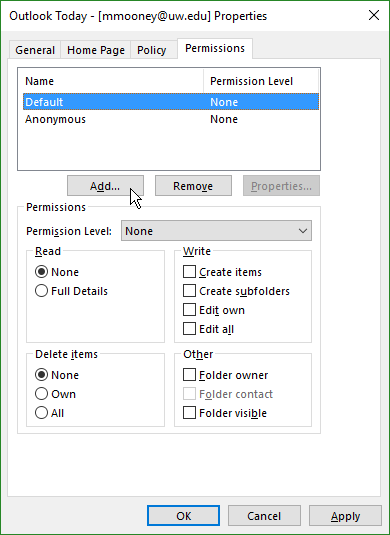
On the Permissions tab of the new window, click Add.

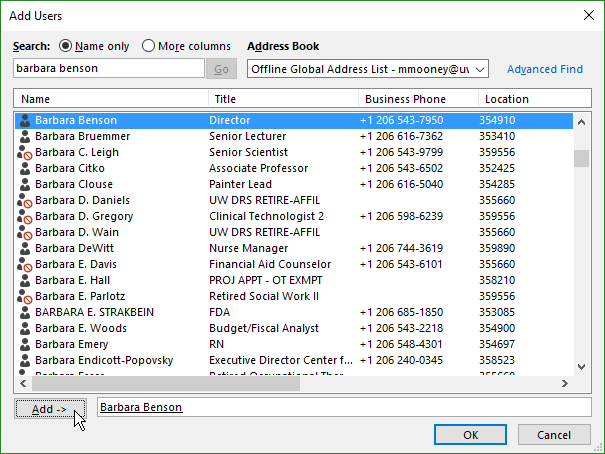
Type the name [First Name Last Name] of the UW employee that you wish to receive access to your shared folder(s).
Once the correct individual appears in the search results, make sure their name is highlighted and click Add. Their name should now appear in the field at the bottom.
Repeat the search, highlight, and Add steps for each individual you wish to grant access.
Click Ok.
Note: If you are unable to locate the appropriate person:
- Confirm that Outlook is searching the Global Address List (displayed at the top-right of the search window).
- Check the UW directory webpage for the correct and full spelling of a person’s name – their entry in the global address book may include a middle initial.
If your office uses UW groups, you may use a group name in place of an individual employee’s name to assign permissions to the entire group. This way the folder permissions will automatically be updated each time the group’s membership changes.
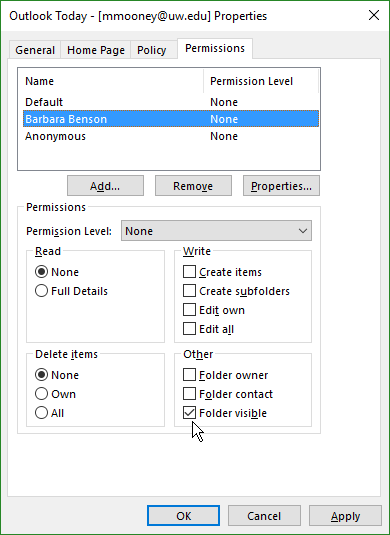
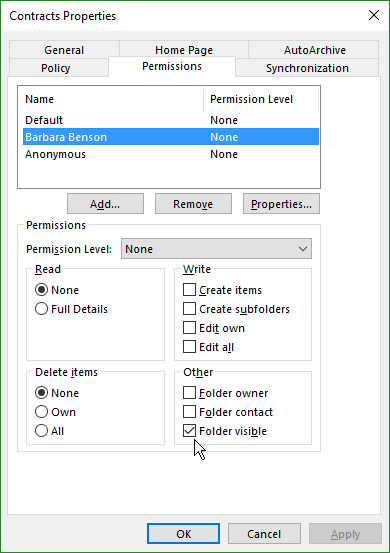
Once you have added the person(s), their name should appear highlighted in the list in the Permissions window.
With their name(s) still highlighted, under the section labeled Other, check the Folder visible box.
Click Ok.
Step 2: Granting limited permissions to any parent-level folders [where applicable].
If the folder(s) you wish to share are not top-level folders (i.e. they are themselves subfolders), and you do not intend to grant User2 access to the contents of these parent folders, you must still grant User2 limited permissions to find that you are sharing a subfolder(s).
If the folder you are sharing is a top-level folder, such as your Inbox, you should skip ahead to Step 3.
Note: Our resource on Folder Relationships in Outlook explains top-level and parent/child folders in email.
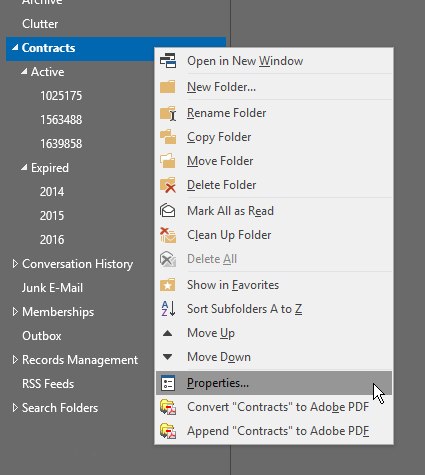
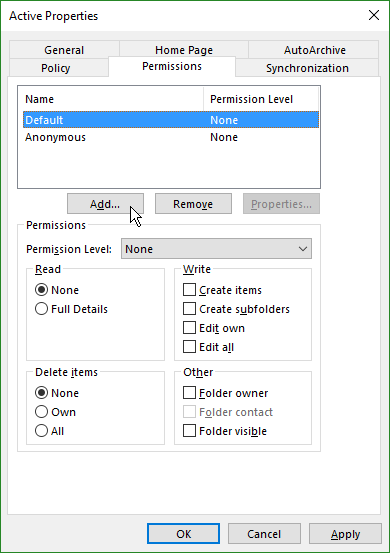
In the folder list, right-click on the name of the parent folder and choose Properties.
On the Permissions tab of the new window, click Add.
Just as in Step 1, type the name [First Name Last Name] of the UW employee that you wish to receive access to your shared folder(s).
Once the correct individual appears in the search results, make sure their name is highlighted and click Add. Their name should now appear in the field at the bottom.
Repeat the search, highlight, and Add steps for each individual you wish to grant access.
Click Ok.
Once you have added the person(s), their name should appear highlighted in the list in the Permissions window.
With their name(s) still highlighted, under the section labeled Other, check the Folder visible box.
Click Ok.
Step 3: Granting permissions to all folders whose contents you wish User2 to be able to access.
Thus far, we have only made the names of your email and any parent folders visible to User2. This step will give User2 access to view and add/delete emails from the specified folder(s) you wish to share. (These instructions are similar to those from Steps 1 & 2 but differ greatly towards the end.)

In the folder list, right-click on the name of the folder you wish to share and choose Properties.
On the Permissions tab of the new window, click Add.

Just as in Steps 1 & 2, type the name [First Name Last Name] of the UW employee that you wish to receive access to your shared folder(s).
Once the correct individual appears in the search results, make sure their name is highlighted and click Add. Their name should now appear in the field at the bottom.
Repeat the search, highlight, and Add steps for each individual you wish to grant access.
Click Ok.

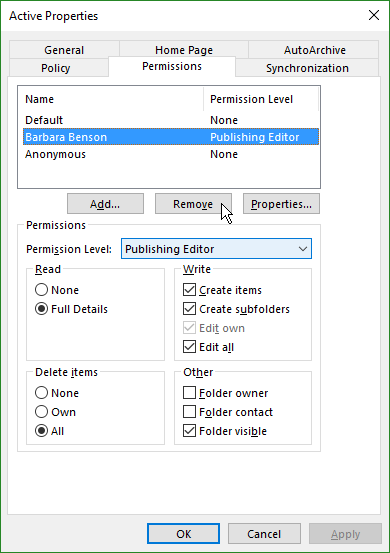
Once you have added the person(s), their name should appear highlighted in the list in the Permissions window.
With their name(s) still highlighted, click on the Permission Level dropdown box to choose the level of sharing privileges you wish to grant:
- Contributor allows them to add emails to the folder without being able to view its contents.
- Reviewer allows them to read the contents of the folder but not add new emails to it or delete emails from it.
- Publishing Editor gives them full access to read the contents, add new emails, delete emails, and create new subfolders.
- Notice that choosing any of these permission levels automatically checks the Folder visible box we used in Steps 1 & 2.
- Click Ok.
- Repeat these steps for each folder/subfolder you wish User2 to be able to access.
As a best practice, we strongly recommend drafting an email to User2 (and cc yourself) outlining the folders and the permissions you've granted them along with a link to the instructions in the next section of this webpage. Once you've sent that email, save a copy for yourself so you can refer to it later as a reminder of which folders you've shared and with whom.
Note: Please be aware that any new subfolders you create will inherit the existing permissions of their parent folder by default. New top-level folders will have their names (but not contents) visible to User2. New subfolders under a shared folder will have the same permissions as the shared folder. You can change those permissions manually by following the same procedure outlined in Step 3 above.
User2: Follow these steps if you have been granted access to a shared folder
Step 1: Changing the settings of your email account to accept shared access from User1.
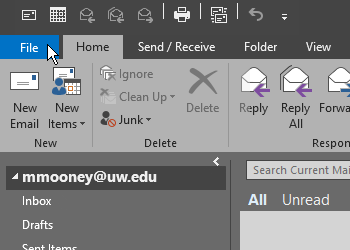
In Outlook, click on the File tab located at the upper-left corner of the window.

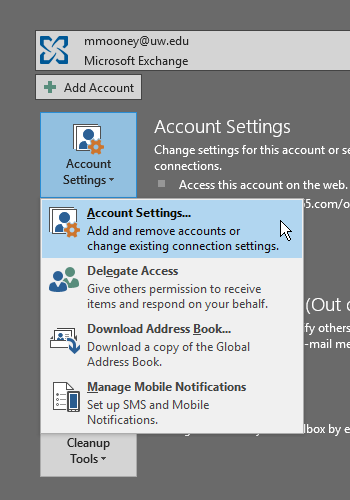
Click on the Account Settings button and choose Account Settings from the sub-menu.
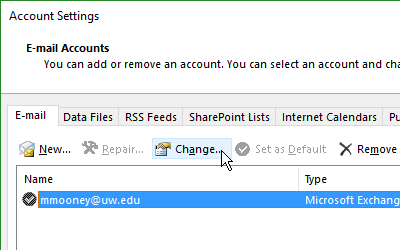
On the E-mail tab of the new window, make sure your email address is highlighted and click Change.

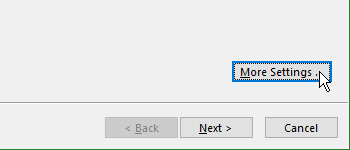
Click the More Settings button.
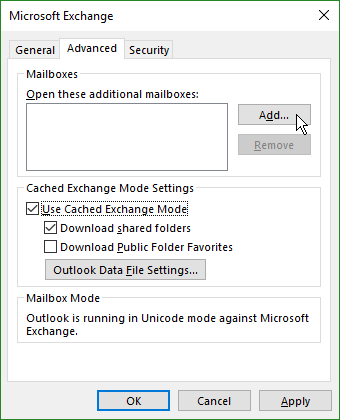
On the Advanced tab of the new window, click Add.
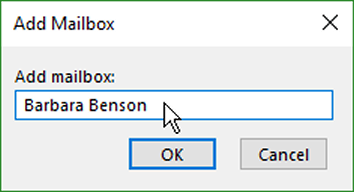
Type the name or the netid of the UW employee that granted you shared access, then click Ok. Their name should now appear in the list next to the Add and Remove buttons.
If you receive an error message, check the university staff directory webpage for the correct and full spelling of a person’s name/netid.
Click Ok to return to the Change Account window.
Click Next, then click Finish to return to the Account Settings window.
Click Close.
Step 2: Viewing their shared folder(s)
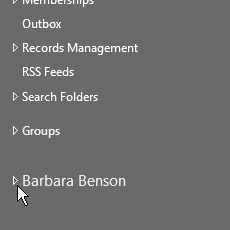
In your Outlook folder list, below all of the folders of your email account, the name of the person who granted you Shared Folder permissions (User1) should be listed.
Click on the arrow to the left of the person’s name to view the folder(s) they have shared with you. There may be multiple levels of parent/sub-folders that need to be expanded to find the shared folder(s).
Note: Sometimes it can take a while for granted permissions to promulgate across the server, so if User1’s name is listed but the shared folders do not immediately appear after you click on the arrow, wait 24 hours.
If the folders still do not appear after 24 hours or if the folders appear but without their contents:
- Ask User1 to double-check that they have granted the correct permissions.
- Close Outlook and restart your computer, then log in and check again.
- Contact UW-IT or your local computer support team.
Assuming you were given sufficient permissions (i.e. Contributor or Publishing Editor, not Reviewer), you can now simply drag-and-drop emails from your Inbox or personal folders into the shared folder.
And assuming you were given sufficient permissions (i.e. Reviewer or Publishing Editor, not Contributor), you can now simply drag-and-drop emails from the shared folder into your Inbox or personal folders.
Any changes either of you make to the contents of the shared folder will be visible to the other nearly instantaneously.
Removing Shared Folders
The process for removing shared folders is nearly the same as adding them. First, User1 must revisit and revoke the privileges granted for each folder location. Then User2 must change the settings of their email account to remove shared access from User1.
User1 must:
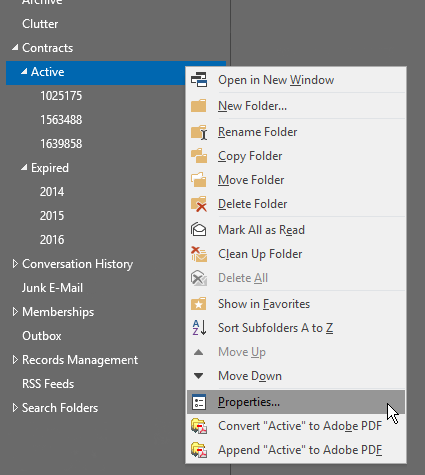
In the folder list in Outlook, right-click on the name of the folder you are currently sharing and choose Properties.
On the Permissions tab of the new window, click to highlight the name(s) of the individual(s) with whom you are sharing and click Remove. Once done, there should be only a single entry for Default with a permission level of None. (If there is an entry for Anonymous, confirm that it too is set to None.)
Click Ok.
Repeat this process for each parent- and/or sub-folder location being shared.

Once all folder permissions are removed, right-click on your email address at the top of your folder list and choose Folder Permissions.
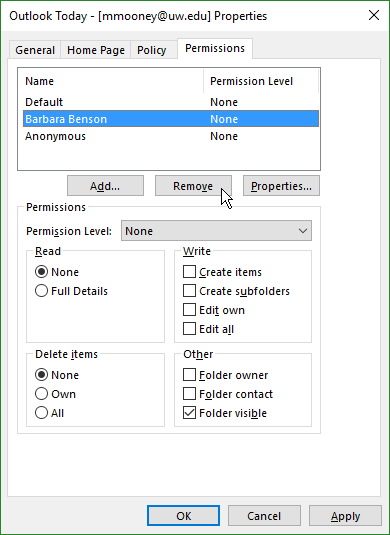
On the Permissions tab of the new window, click to highlight the name(s) of the individual(s) with whom you are sharing and click Remove. As before, there should be only a single entry for Default with a permission level of None. (If there is an entry for Anonymous, confirm that it too is set to None.)
User2 must:

In Outlook, click on the File tab located at the upper-left corner of the window.
Click on the Account Settings button and choose Account Settings from the sub-menu.

On the E-mail tab of the new window, make sure your email address is highlighted and click Change.
Click the More Settings button.
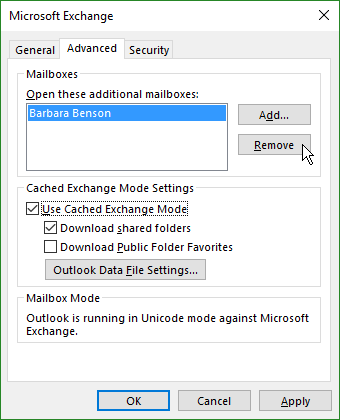
On the Advanced tab of the new window, click to highlight the name of the UW employee that granted you shared access, then click Remove. Their name should no longer appear on the list.
Click Ok to return to the Change Account window.
Click Next, then click Finish to return to the Account Settings window.
Click Close.
The name of the person who granted you Shared Folder permissions (User1) should now disappear from your Outlook folder list.